Difference between KOICHA and USUCHA

Making Matcha Usucha and KoichaMaking Matcha Usucha and Koicha

Have you ever wondered why some green tea shops have a strong taste while others have a very weak taste, even though they use the same matcha powder? That’s because there are actually two ways to brew green tea in Japanese culture, called Usucha and Koicha. These are traditional ways of preparing matcha that originate from the Chado ceremony, a Japanese tea ceremony.

If we translate it directly from Japanese, Usucha means “light tea”, while Koicha means “strong tea”. It may not be easy to understand, but the meaning is straightforward. Usucha matcha has a thick layer of foam on the surface, which can be easily achieved by beating the tea with a tea brush. The taste is smooth. When you first drink it, it is sweet and bitter, but when you swallow it, you will get the umami taste. It is brewed in a small cup for one person, so the tea has a mild and slightly bitter taste. In the old tea ceremony, this type of tea was eaten with Higashi Japanese sweets, but nowadays it is eaten with namagashi, such as mochi, dango, nerikiri, and yokan.

Making Matcha Usucha and KoichaMaking Matcha Usucha and Koicha

On the other hand, Koicha matcha is much more concentrated and has an umami flavor that may be too strong for beginners to drink. This is because Koicha requires about twice the amount of matcha powder and half the amount of water compared to Usucha. Because in the tea ceremony, Koicha is brewed in a large container, so it can be drunk by many people, it needs to be brewed to have a stronger flavor.

It can be seen that in the two traditional styles of matcha brewing, the highest quality matcha is preferred for the ceremony, that is, using tea powder where the tea leaves are covered with leaves, to be exposed to the least amount of sunlight for the first 20 days or so. This period is calculated from the time when the first buds start to sprout. This covering to block the sunlight prevents the sweetness in the leaves and limits the bitterness that can be produced. The tea leaves are harvested by skilled hand pickers to maintain the quality of the tea leaves until the final stage. Because after picking the tea leaves, they must be steamed to prevent oxidation of the tea leaves and maintain their green color and freshness.
Then, it is dried and sorted to prepare for grinding with a large granite mortar into a fine tea powder called matcha [抹茶]. Whether the mortar is turned manually or automatically, the amount of tea powder that can be collected per hour is only forty grams. The best quality tea leaves are made from the top young leaves, so the production is labor-intensive, which inevitably makes the price relatively high.

Green tea is a beverage that has been with the Japanese for a long time. It is used in many important events, such as welcoming important guests, birthdays, or changing seasons, to truly experience the taste of drinking tea. However, making your own usucha and koicha does not make the activity a complete matcha tea ceremony in the Japanese style. This is because the actual ceremony has many other steps that are quite complicated.
Therefore, some cafes nowadays use the names of these two types of tea brewing as the names of their menus to help customers understand the taste and strength of the tea. There is no traditional Japanese tea ceremony when serving it.

However, even though Usucha tea is a light tea with a not very strong flavor, it may still be too strong for those who have never tried matcha. If you are not a regular tea drinker, it is recommended that you start with Matcha Latte first, or if you are using pure matcha, you should brew it weaker than the original Usucha.

Making Matcha Usucha and KoichaMaking Matcha Usucha and Koicha

How to prepare Usucha and Koicha

To make Usucha, mix 1 teaspoon of matcha powder with 60 ml of hot water and quickly whip the matcha in an M shape until dissolved. Repeat until the matcha has a thick foam with many small bubbles. Finish by whipping in a circle and lifting the matcha from the center of the bowl.

For concentrated Koicha, use 2 spoons of matcha powder with 30 ml of hot water and slowly stir in a circle until dissolved. Avoid creating bubbles to obtain a concentrated matcha with a consistent taste. The water used to brew both types of tea should be 85 degrees hot water, which is enough. This is another precaution to maintain the best taste of tea because each type of tea is suitable for different water. (Read more at https://bit.ly/3tWmvZj ) In addition to the temperature precautions, the water used to brew matcha does not need to be mineral water. Just use water with a neutral pH value. (Read more at https://bit.ly/3dRldcB )

Making Matcha Usucha and Koicha

Source

https://naokimatcha.com/recipes/usucha-and-koicha-2/

Article from : Fuwafuwa

Understanding the difference between Ceremonial grade and Cooking grade matcha powder

Matcha Powder

Have you ever noticed that the green tea we buy in the market or from cafes has different shades of green, even though it’s all green tea? That’s because there are many grades of matcha powder, and each grade has different characteristics, flavors, smells, and colors, which come from tea leaves that go through different harvesting processes. Each grade of matcha powder is suitable for different uses, namely:

Matcha powder can be broadly divided into two grades: 1. Ceremonial grade (ceremonial matcha) and 2. Cooking grade or Culinary Grade (Matcha for cooking) The division of matcha powder into 2 grades is similar to the division of wine into fine wines for drinking neat and wines for cooking.


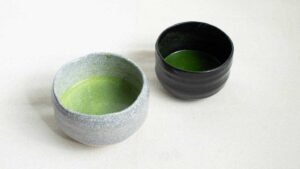
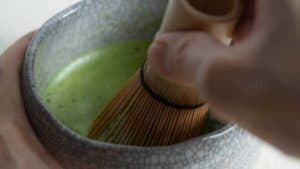
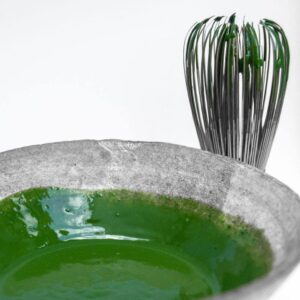
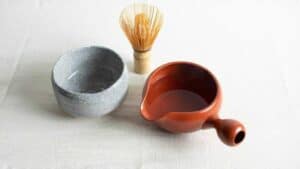
Ceremonial grade ( Matcha Ceremonial) With a soft taste, naturally sweet and no bitter taste of bright green matcha powder, giving a clearer color than Cooking Grade, ceremonial matcha is a high-grade tea, comparable to fine wine. With a delicate taste Even using a small amount to brew, it can produce a good taste. This grade of matcha powder has a smooth texture like flour and gives a very good texture. Therefore, it is suitable for brewing hot or seasoning in the simplest way. To get a soft texture with a light sweetness Japanese people like to use this grade of tea in tea ceremonies. According to traditional Japanese culture, it is not popular for making desserts or food. Because if you brew it as matcha latte or make desserts, the soft and sweet taste may be overshadowed by other ingredients. And importantly, this ceremonial grade tea is quite expensive. If used to make desserts or lattes, it may increase the cost.

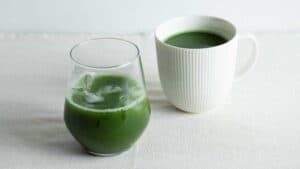
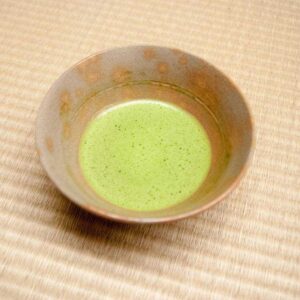
C ooking grade or Culinary Grade ( matcha for cooking) is a tea grade used for making desserts, food, smoothies, ice cream and hot and cold drinks. When cooked with other ingredients, it will make the flavor of the green tea in that menu stand out even more. The color of the tea powder of this grade is not bright green like ceremonial matcha because it comes from tea leaves that were harvested later. This type of matcha powder is further broken down according to the smell, color and flavor of the tea powder to suit different menus. If anyone likes the intensity and bitter taste of this grade of tea, they can choose to brew pure green tea to drink, but it is not as popular as Ceremonial Grade.

Matcha Quality

However, the two types of tea have different characteristics, so to make it easier to understand, they are as follows:

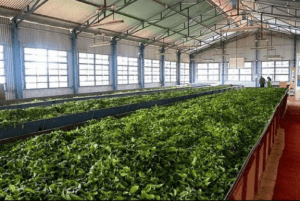
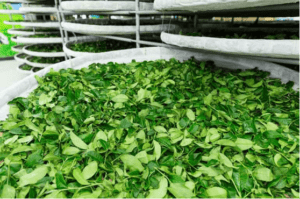
  1. Harvesting Ceremonial Matcha comes from the first young leaves of the tea, which are the best leaves, around the end of April or the beginning of May only. This is the first harvest, which usually yields the best leaves because the tea tree still retains nutrients stored during the winter. The top leaves that are picked will have a sweeter taste than the lower leaves. However, Cooking Matcha comes from the second harvest, which has a more bitter taste, is not as bright in color as ceremonial grade teas, and the leaves are harder.Ceremonial grade&Cooking grade
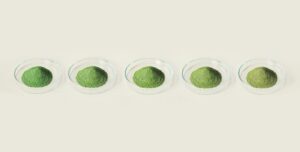
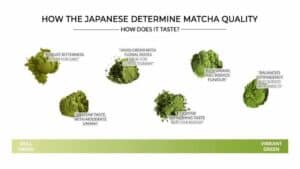
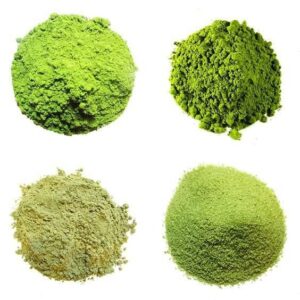
  2. The color of the tea powder is bright green and indicates the freshness and quality of the tea. Ceremonial grade matcha with high tea quality is brighter green than cooking matcha because it is the first harvested tea leaves that contain the highest levels of chlorophyll and L-theanine. Matcha powder that is yellowish green or not bright green indicates that it comes from older tea leaves, which are harvested from the bottom of the tea plant. However, some Japanese tea varieties that are grown with a lot of volcanic soil around them also affect the color of the tea. For example, Kagoshima matcha is known for having a slightly dark green color, while Seimei is a very bright green color.

Matcha Powder2In addition to the above differences, if the tea leaves come from an organic tea plantation, the taste will be different from that of a normal tea plantation that may have used chemicals in planting. Precautions for choosing matcha for cooking that are available in the market today: if you choose a very cheap grade, it may taste too astringent and you may not even taste the matcha at all.

Matcha Powder
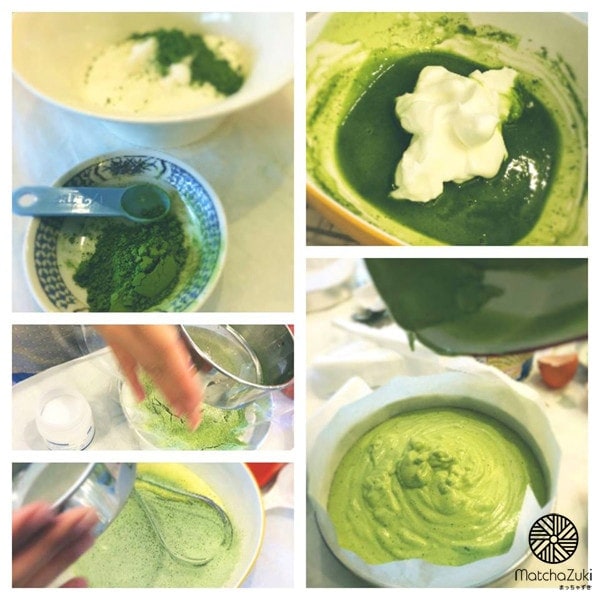
However, the two grades of matcha are designed for different uses and cannot be clearly compared. Matcha powder for cooking can also be divided into several sub-categories according to its usage. The choice of the two grades of matcha powder depends on your preferences and the results you want to achieve. Whether you want to eat it as ice cream, nama chocolate, pudding, cheesecake that has a clear tea flavor and green tea color, the highest grade of tea for cooking is suitable for use. The lower grades are used to make desserts that require a strong, bitter flavor, such as brownies, cakes, or soba noodles. Or if you only use the color and do not emphasize the clear flavor, you can use a lower grade of green tea to make bread and sprinkle it on the dessert. But if you want to brew it with plain water to get the umami flavor of the tea, it is recommended to use ceremonial grade tea. In addition to dividing tea grades by harvest, it can also be divided into 2 types according to the tea brewing method, called KOICHA and USUSHA brewing. See more at https://bit.ly/2RrD29N

Source

https://www.matchaeologist.com/blogs/explore/ceremonial-vs-culinary-matcha

https://naokimatcha.com/articles/ceremonial-gradematcha/

http://fullleafteacompany.com/products/matcha

Article from : Fuwafuwa

Getting to know the tea production process (Tea Processing)

The tea production process is considered an art. Because of the close control of production And with the meticulousness of every production step, it will result in a variety of teas with different flavors. Whether it is drying the tea leaves, or withering, through rolling and fermentation or oxide reaction, every step is important to the taste of the tea. The production of good tea leaves must also be planted in good quality. Because the important part comes from the natural environment, both the terrain and the climate. And there are many things that are worth knowing about growing green tea (Read more at https://bit.ly/3eRNXRU ). In Japan itself, there are only a few places that can grow green tea with good yields. The well-known area is Uji City, Kyoto, where farmers have experience in both planting and harvesting techniques.Tea Processing

The tea leaf harvesting process begins in early May, when the young leaves are carefully selected from the tea plant, with the best young leaves being called “ichibancha (一番茶).” Experts select only the youngest and greenest leaves to be namacha (生茶), or “fresh tea.” The leaves then go through the main production steps, as follows:

  1. Withering: This process is done by shaking off moisture from fresh tea leaves at room temperature for 8-24 hours (depending on the type of tea to be produced). The leaves are then dried to reduce the water content of the tea leaves by 50-60%. The resulting tea leaves are soft and bendable before being processed further.Tea Processing
  2. Rolling: By rolling the leaves to dry them by twisting and crumbling them. During rolling, some broken leaves are normal. If there is no machine, some people may shake or use their hands. During the rolling process, oil will come out of the tea leaves, giving the tea a special aroma. The chemical changes that occur for a short period of time through rolling will result in tea leaves with good taste and aroma. After that, they will be sent to a sifter to separate the types of tea. Small leaves will go to the next step, while bigger and harder leaves will be sent back to be rolled a second time.Tea Processing
  3. Oxidation/Fermentation is a chemical process in which oxygen is absorbed to release enzymes that react with air. It begins when the leaf membranes break down during oxidation, causing the leaves to turn a bright gold color. This is the key factor in determining whether a tea is green, black or oolong. It is a transitional stage that affects the aroma and color. If this stage is stopped too soon, the tea will be green and may have a metallic taste. If fermented for too long, it will gradually become sweet and lose both its quality and aroma.
  4. Drying or burning: This process will dry the leaves evenly throughout the leaves by applying continuous heat of about 120-200 degrees Fahrenheit to stop the oxidation fermentation process. There are two ways to stop the oxidation fermentation process: steaming using heat or by roasting. The tea leaves are placed in a large iron basin for about 20-30 seconds and heated to 100 degrees Celsius. This stops the destruction of the enzymes that cause fermentation. The tea leaves remain green. Roasting causes the tea leaves to turn black and dry, leaving only 2-3% moisture. However, excessive heat can cause the tea to lose its flavor, color, and aroma.
  5. Grading is a process in which leaves are graded using a screening device or sieve with different sized burrs.
    Tea Processing The above steps do not mean that all types of tea must go through this process, but it is just an overview of the tea leaf processing process. The production of each type of tea will have slight differences, resulting in different flavors. For example, the production of white tea has the shortest steps because it does not have to go through the rolling process and the fermentation process or the oxidation reaction. The young tea leaves will be picked and dried before entering the drying process using steam immediately. Because white tea does not have a fermentation process, the color of the tea leaves is still green and white. In terms of the production of black tea , it is the tea that goes through the most processing steps. The collected tea leaves will go through the full fermentation process, consisting of the 5 basic steps above. During the drying period, the leaves will be 80% dry, which is black tea. But if it is dried too much, it may not have a fragrant smell. The method of making oolong tea is similar to black tea, but the difference is that the leaves are dried directly in the sun for 6 hours. Then, the leaves are shaken in a bamboo basket to make the edges of the leaves flawed, while the center is still green. The fermentation time is about half that of black tea. The oxidation reaction is stopped by making a fire. For oolong tea, the leaves are heated at a higher temperature because they contain a lower water content.Tea Processing

Green tea starts with the first drying of the tea leaves. After that, they are placed on a pan or steamed to prevent the oxide reaction. Finally, the leaves are rolled and dried quickly for the last time. This method keeps the tea leaves green. Due to the simple and less steps in the production process, green tea still has more beneficial plant substances than other types of tea. Green tea can also be divided into 2 types: steamed green tea and roasted green tea.

1.1 Steamed green tea is the process of stopping the chemical processes in the tea leaves by steaming them for a short period of time. When picking the tea leaves, they must be steamed at a temperature of 100 degrees Celsius for 0.7 minutes to stop the activity of the enzyme polyphenol oxidase. Then, they are massaged with hot steam to reduce the moisture content in the leaves. Then, they are massaged in a room at normal temperature to break the cells and massaged with heat again to make the tea leaves roll up beautifully. Then, they are dried to reduce the moisture content in the tea leaves to 4%. Most steamed green tea is processed in Japan. The color of this type of tea is green to yellowish green because it still contains chlorophyll.

1.2 Roasted green tea is tea that stops the chemical processes in the tea buds by roasting them in a hot pan at a high temperature of about 300-350 degrees Celsius, then kneading to break the cells until they roll up and dry. Roasted green tea can be separated into 2 types: lightly fermented roasted green tea and unfermented green tea. The color of the tea is light green with a yellow tint.

From the various steps of tea production process above, it can be easily summarized in this diagram.

Tea Processing chart

I believe that tea lovers, after reading this article, many of you will definitely start to be interested in visiting tea plantations in Japan ^^

Source

http://www.refresherthai.com/article/teaMade.php

http://www.ocha.tv/how_tea_is_made/process/schedule_ryokucha/

Article from : Fuwafuwa

Green Tea Matcha Chiffon Cake

How to make Green Tea Matcha Chiffon Cake^^

This recipe is from Khun Jumjee in Pantip. The ingredients and method are mostly the same as the original. The only change is the matcha green tea powder and a little bit of matcha green tea powder is added to the cream. ^^

Key Ingredients (for a 2-pound cake)

Cake batter

1. 40 grams of cake flour

2. 50 grams of fine baking sugar

3. Matcha green tea powder (medium grade) 2 teaspoons

5. 1/4 teaspoon salt

4. 1/2 teaspoon vanilla powder

6. Egg yolks (size 2), 2 eggs

7. Vegetable oil (in the recipe, soybean oil is used) 30 grams

8. 50 grams of fresh milk

9. 2 egg whites

10. 30 grams of powdered sugar

11. A little bit of lemon juice

Cream part

1. Whipping cream 250 grams

2. 50 grams of fine baking sugar

3. MATCHAZUKI Excellent grade matcha powder 1.5 teaspoons

Procedure

1. Put flour in a bowl, followed by sugar , matcha green tea powder, vanilla powder, and finally salt.

2. Use a hand whisk to mix all ingredients until they are well blended and do not clump together. Set aside.

3. Next, make the egg yolk part. Start by cracking cold eggs into a cup or bowl (eggs are very important for chiffon cake, so they should be fresh). Separate the egg yolks from the whites, then put the egg whites in a mixing bowl and set aside.

4. Add the egg yolk cup, add oil and then add fresh milk. Set aside.

5. For the last part, which is the egg white part, prepare these 3 things: egg white, lemon juice, and powdered sugar. Separate them first. But you have to prepare them because you have to make them quickly and bake them quickly, or else the eggs will collapse.

6. Preheat oven to 180 degrees Celsius.

7. When everything is ready, start by beating the egg whites on high speed until they are foamy.

8. Squeeze some lemon juice.

9. Then gradually add in the powdered sugar. Do not add it all at once, as this may cause the egg bubbles to collapse.

10. Beat until it forms peaks as shown in the picture.

11. Make the egg yolk mixture. Pour the egg yolk mixture into the flour mixture. Some people may make a well in the center, which will help.

12. Stir quickly, vigorously, and just right. This is the phrase you need to memorize when stirring the egg yolk mixture (the cake will come out soft and melt in your mouth or tough and rough depending on the amount of stirring). Stir until just combined. If you don’t see any white flour, stop immediately.

13. Put the egg whites on top. Actually, according to the theory, you have to pour the flour and egg yolk mixture on top because the egg yolk flour mixture is heavier than the egg white mixture. If we put it on the bottom like this, it will make it difficult to mix together. But that doesn’t mean there’s no way around it. After putting it in like this, flip the egg yolk flour mixture over and pour it on top of the egg white mixture. It will be much easier to mix.

14. Use a rubber spatula to mix the ingredients together. [*Folding means to scrape the rubber spatula along the surface of the mixing bowl to lift the ingredients that are stuck to the edges of the bowl (which are usually heavy ingredients, such as egg yolk flour, etc.) up, not sticking to the edges of the bowl, which will make it difficult to mix. When the heavy ingredients have lifted up to prevent them from sticking back to the edges of the bowl, we flip the rubber spatula to place the heavy ingredients in the center. Now it’s easy to mix, which is called folding.]

15. When mixed together, stop mixing. Observe that the color of the mixture has no streaks. A dark color (in this case, green) means it is mixed. Tap the mold first by doing the following: hold the mold higher than the table surface and let the mold fall freely. Do it about two times to get rid of air bubbles in the cake. Don’t be afraid of it collapsing. Then pour it into the mold and put it in the oven.

16. Bake for about 30 minutes. (**Note: The cake must be cooked. Check for doneness by touching the surface of the cake with your finger. If it sinks and you see a mark when you remove your finger, it is not done yet. Bake for another 3-5 minutes and touch it again. If you start to see no sign of sinking, it is done. Remove it from the oven and use the same technique as before baking: let it fall freely. If it is done, it will not sink, I guarantee it.)

17. Let it cool in the mold or you can scoop it out. It’s not against the rules. Another technique is to turn it upside down on a wire rack. I’ve shared this with my friends, brothers, and sisters here. It’s a good technique because it prevents the cake from collapsing and the texture of the cake is light.

18. Then slice the cake.

19. Now let’s make the cream. This recipe is smooth and not too sweet. If you add more sugar, the aroma of the whipped cream will be greatly reduced. Believe it or not, put the whipping cream in the freezer. But don’t put it in for too long because there is a high risk that the whipped cream will separate. Actually, it is not recommended for beginners because it is easy to make a mistake. But if you have done it before, you can freeze it for 10-15 minutes and it is still usable and easy to whip.

20. When done, beat at high speed and gradually add in powdered sugar. Actually, beat until it starts to form a whisk mark on the whipped cream, then add it right away or add a little bit first. But don’t add it too late because the sugar will not dissolve.

21. When the peaks are stiff, it’s ready. Don’t make it too runny because it will run. It’s okay if it’s a little stiff because the cake is already light. But don’t beat it too much until the whipped cream separates. When you can see the whisk’s tip clearly, you can stop. Be careful with this.

22. Once it’s done, you can put the cream in the refrigerator first because it might be hot. You can freeze it for about 10 minutes, then start decorating it. Spread the cream until it’s as thick as in the picture. Stick the top piece.

23. Spread the cream all over the cake.

24. The final step is to sprinkle green tea powder onto the surface by sifting it through a sieve.

That’s it. Have fun doing it ^.^

matcha-cake2

Credit : http://topicstock.pantip.com/food/topicstock/2008/01/D6272478/D6272478.html

———————————-

MATCHAZUKI – Crafted for matcha lover
“Because we choose matcha, like people who love matcha.”⠀⠀
It’s a beautiful place.