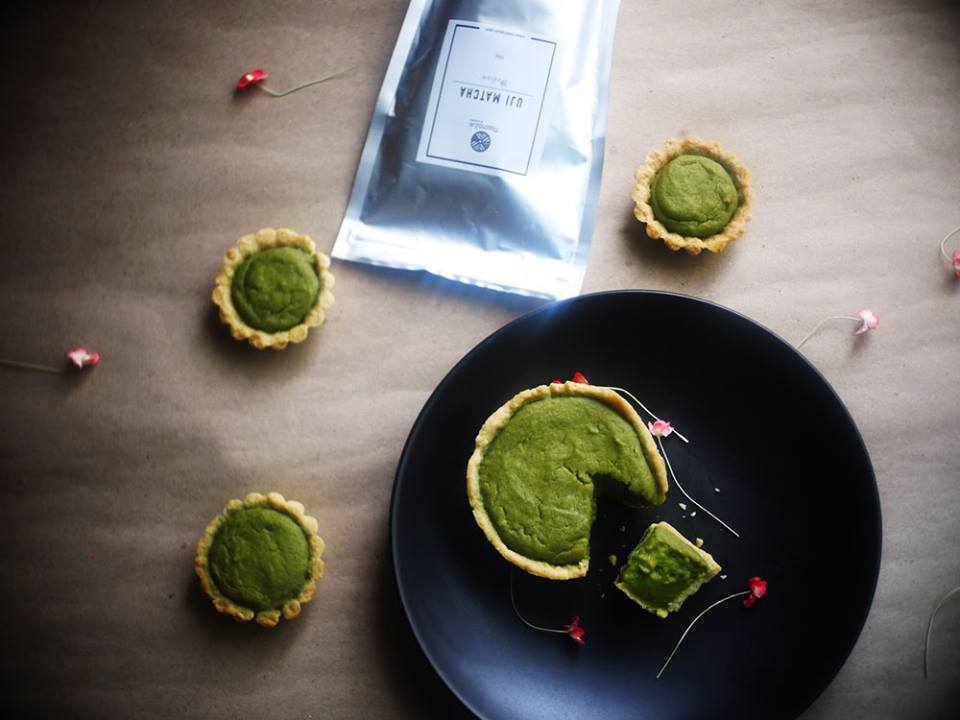
Matcha Coconut Rice Pancakes

สวัสดีครับ แฟนเพจของ MATCHAZUKI ผงมัทฉะเกรดพรีเมี่ยมจากญี่ปุ่น ทุกท่าน เป็นอย่างไรกันบ้างครับ ผ่านช่วงวันหยุดสงกรานต์มาแล้ว ไปพักผ่อนคลายร้อนกันที่ไหนมาบ้างครับ และเนื่องจากเป็นช่วงวันสงกรานต์ วันครอบครัว วันนี้ทางเพจ MatchaZuki ของเรา จึงมีเมนูขนมไทยง่ายๆ ที่นอกจากความอร่อยแล้ว ยังช่วยสานสัมพันธ์ในครอบครัวได้เป็นอย่างดีเลยล่ะครับ เมนูที่ว่านั่นก็คือขนมครกชาเขียว นั่นเอง ทานกันไป ก็ช่วยกันแคะขนมไป รับรองว่ายิ่งทำให้ความสุขพุ่งสูงขึ้นแข่งกับความร้อนเลยล่ะครับ ไปดูสูตรและวิธีทำกันเลยดีกว่าครับ

ส่วนผสมสำคัญ
ตัวขนมครก
1. แป้งข้าวเจ้า ½ ถ้วย
2. แป้งข้าวเหนียว 2 ช้อนโต๊ะ
3. หัวกะทิ 150 มิลลิลิตร
4. ผงมัทฉะ MATCHAZUKI 1 ช้อนชา
5. น้ำร้อน 200 มิลลิลิตร

หน้าขนมครก
1. หัวกะทิ 150 มิลลิลิตร
2. ผงมัทฉะ MATCHAZUKI 1 ช้อนชา
3. น้ำตาลทราย 50 กรัม
4. เกลือ ½ ช้อนชา

ขั้นตอนการทำ

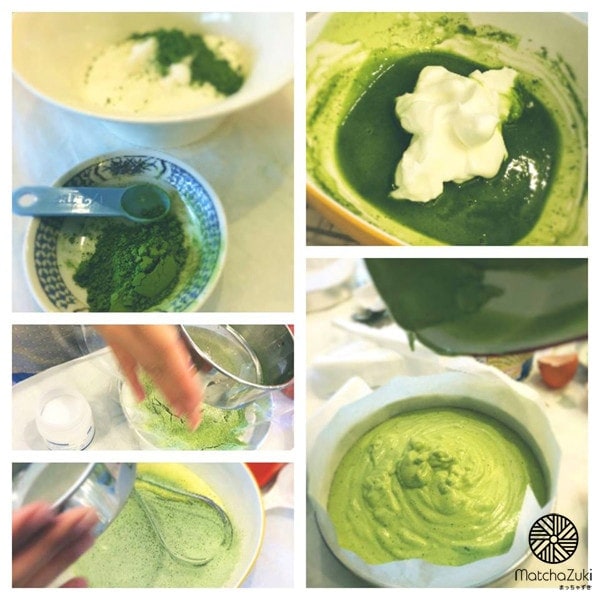
1. นำส่วนผสมตัวขนม ผสมให้เข้ากัน พักแป้งไว้อย่างน้อย 1 ชั่วโมง

2. นำส่วนผสมหน้าขนม ผสมให้เข้ากัน พักแป้งไว้อย่างน้อย 1 ชั่วโมง

3. นำตัวเบ้าขนมครกตั้งไฟให้ร้อน ทาน้ำมันรอให้ร้อน หยอดตัวขนมครกลงไปประมาณ ¾ ของเบ้าขนมครก ปิดฝาให้ตัวขนมสุกดี ราดทับด้วยตัวหน้าขนมครกเล็กน้อย ปิดฝารอให้สุกและด้านนอกเริ่มเกรียมอีกครั้ง

4. เมื่อขนมครกสุกดี ใช้ช้อนสั้นแคะขนมออกจากเบ้า โรยหน้าด้วยถั่วแดง หรือฝอยทอง ตามชอบ

“ขนมครกชาเขียว” เป็นขนมไทยๆ ที่ใครๆก็ชอบ ด้วยรสที่หวานมันของกะทิ เพิ่มความเข้มข้นที่เข้ากันดีของชาเขียวแท้ๆ ทำให้รสชาติของขนมครกยิ่งเด่นขึ้น ยิ่งทานคู่กับถั่วแดงและฝอยทอง ยิ่งเพิ่มความอร่อยๆได้ดีจริงๆครับ

———————————-

MATCHAZUKI – Crafted for matcha lover
“เพราะเราเลือกมัทฉะ อย่างคนที่รักมัทฉะ”⠀⠀
マッチャラブユー

Green tea dorayaki with red bean filling, a Japanese style dessert

Ang Ang Ang Todtemodaizuki Doraemonnnnn… Hello everyone, today I would like to greet you with a song from the famous cartoon Doraemon. Therefore, the snack that the MATCHAZUKI page, premium grade matcha powder from Japan, will introduce today will definitely not be this kind of snack, which is Doraemon’s favorite green tea dorayaki with red bean filling. Let’s see how to make it ^^

Key Ingredients
1. 90 grams of cake flour
2. 1 tablespoon baking powder
3. 1 tablespoon of medium grade MATCHAZUKI matcha powder
4. 1 chicken egg
5. Fresh milk 120 cc.
6. 3 tablespoons of sugar
7. Azuki red bean paste

Procedure

1. Mix cake flour, baking powder, and matcha green tea powder together and sift them together. Set aside.

2. Beat the eggs with sugar until the sugar dissolves. Then add the milk and beat until combined.

3. Pour the sifted flour mixture into the egg mixture. Use a whisk to mix until the mixture is well combined. Let the dough rest for about 1 hour.

4. Use a ladle to scoop the batter and drop it into the Teflon pan to form a circle. Fry over low heat until bubbles appear on the batter. Flip over and wait until the batter is cooked.

5. Place the red bean paste on the fried dough and then put another piece of dough on top.

Matcha Dorayaki with Red Bean Filling is a dessert that has a rich taste and green tea aroma from the dough, and the sweetness of the red bean paste. It is not surprising why it has been a favorite dessert of the Japanese for a long time. It is also easy to make. If anyone likes it, try making it. I guarantee that you will not be disappointed. ^^

———————————-

MATCHAZUKI – Crafted for matcha lover
“Because we choose matcha, like people who love matcha.”⠀⠀
It’s a beautiful place.

Matcha Pudding Green Tea Pudding

Hello, today, the MATCHAZUKI page, premium grade matcha powder from Japan, would like to recommend an easy dessert that you can make without an oven. That is Matcha Pudding, which has a bouncy, smooth texture, but still has a soft, melt-in-your-mouth texture. You can eat it plain or with mashed red beans. Let’s see the ingredients and how to make it.

Key Ingredients (This recipe makes about 3 cups)
1. 200 grams of fresh milk
2. 100 grams of whipping cream
3. 4 tablespoons of sugar
4. 2 tablespoons of medium-grade MATCHAZUKI matcha powder (I added a lot in the recipe because I like it strong. Actually, just 1 tablespoon is enough.)
5. 2 sheets of gelatin sheets
6. 1 egg yolk
7. 2 tablespoons warm water for dissolving matcha

Procedure
1. Mix fresh milk, whipping cream and sugar in a pot that we will use to boil. Stir until well blended and set aside.

2. Mix matcha powder with warm water and stir until well dissolved.

3. Pour into the pot of milk that we prepared a moment ago. Then put the pot on the stove using low heat. When the milk in the pot boils gently, turn off the stove and lift the pot down. Slowly pour in the beaten egg yolks. While pouring, use a hand whisk to stir constantly to prevent the eggs from cooking into lumps. Then add the gelatin that has been soaked in cold water and stir until the gelatin has dissolved.

4. Pour the mixture into the desired mold or glass. Then refrigerate overnight or for about 5-6 hours.

Matcha Pudding is a dessert that is loved by all ages. It is equally delicious when served with red beans or whipped cream. If anyone likes this menu, try making it. For today, goodbye ^^

———————————-

MATCHAZUKI – Crafted for matcha lover
“Because we choose matcha, like people who love matcha.”⠀⠀
It’s a beautiful place.

Matcha Churros Spanish Patongo Matcha Churros

Hello, how are you all? During the New Year holiday, has anyone tried making dessert recipes from the MatchaZuki page? Today, the MATCHAZUKI page, premium grade matcha powder from Japan, still has a delicious dessert menu to share as usual. For today, I would like to recommend an easy-to-make and delicious dessert, “Matcha Churros or Spanish Green Tea Patongo”. Let’s see how to make it. ^^

Key Ingredients
Churros
1. 60 ml. fresh milk
2. 80 grams of all-purpose flour
3. 50 grams of salted butter
4. 1 chicken egg
5. 1 teaspoon of medium grade MATCHAZUKI matcha powder
6. 40 ml. hot water
6. Vegetable oil for frying

Green tea sauce
1. 20 ml. fresh milk
2. 20 ml. hot water
3. 1 teaspoon of medium grade MATCHAZUKI matcha powder
4. 1 tablespoon sugar
5. 2 teaspoons cornstarch

Procedure
1. Dissolve matcha green tea powder in hot water, put in a pot, add fresh milk and butter, heat over low heat until hot and melt well.

2. Turn off the heat and remove from the stove. Add the all-purpose flour and mix well. Bring to a low heat again and stir until the flour forms a single lump. Turn off the heat and set aside to cool.

3. Meanwhile, combine all the green tea sauce ingredients and stir until melted. Microwave for 30 seconds. Remove and stir until well combined.

4. Add the eggs to the warm churros mixture and mix well. Scoop into a piping bag with a star tip. Squeeze the filling into a pan over the heat and add warm oil. Fry until crispy. Scoop out and drain the oil. Let cool. Sprinkle with icing sugar. Serve with green tea sauce.

Churros or Spanish fried dough sticks are a delicious and easy-to-make dessert. You can eat them plain with icing sugar or with green tea sauce. It’s so easy and delicious. Try making them! ^^

———————————-

MATCHAZUKI – Crafted for matcha lover
“Because we choose matcha, like people who love matcha.”⠀⠀
It’s a beautiful place.

Matcha Yogurt Cake

Hello, today, the MATCHAZUKI page, premium grade matcha powder from Japan, has another menu that I would like to recommend for everyone to try making. It is a cake that is not difficult to make, not many ingredients, the texture of the cake is fluffy and light, similar to cheesecake, perfect for eating in the summer. That is Matcha Yogurt Cake or green tea yogurt cake. Having said this much, let’s see the ingredients and how to make it.

Key Ingredients
1. 13 grams of cake flour
2. 2 eggs
3. 20 grams of sweetened condensed milk
4. 50 grams of fine granulated sugar
5. MATCHAZUKI Medium Grade Matcha Powder 3 grams
6. 120 grams of plain yogurt
7. Cornstarch 10 grams

Procedure

1. Mix condensed milk with yogurt until well blended. Set aside.

2. Separate the egg yolks and egg whites. Add the egg yolks one at a time to the yogurt mixture and mix well.

3. Mix cake flour, corn flour, and matcha green tea powder together. Sift into the yogurt mixture and set aside.

4. Beat egg whites with sugar until soft peaks form, then mix with yogurt mixture. Fold until well combined. Bake at 170 degrees for 45 minutes, adding a small cup of water to keep the cake moist.

“Matcha Yogurt Cake” is a very easy dessert to make. It has few ingredients and the cake is moist in the style of Japanese cakes. It is soft and melts in your mouth. It goes even better when eaten with cold ice cream or fresh fruit. Let’s try making it ^^

———————————-

MATCHAZUKI – Crafted for matcha lover
“Because we choose matcha, like people who love matcha.”⠀⠀
It’s a beautiful place.

White Choc Matcha Truffles

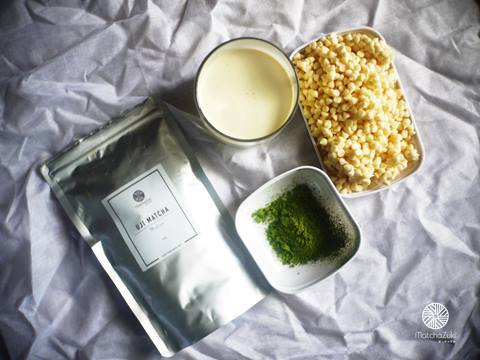
Hello everyone, welcome back to our regular Friday. Today, the MATCHAZUKI page, premium Japanese matcha powder, would like to present the White Choc Matcha Truffles menu to our fans. Truffles are a popular snack among foreigners. They are perfect for pairing with afternoon tea. With the sweet taste and aroma of tea, White Choc Matcha Truffles are perfect for a hot afternoon tea. Plus, they have few ingredients and are very easy to make. Let’s take a look at the ingredients and how to make them ^^

13697082_1726085937616404_7162457496103395974_n

Key Ingredients
1. White chocolate 240 grams
2. 2 tablespoons of medium grade MATCHAZUKI matcha powder (for mixing)
3. Whipping cream 100 ml.
4. MATCHAZUKI Medium Grade Matcha Powder (for mixing)

Procedure

13645329_1726085930949738_1283040969498962539_n
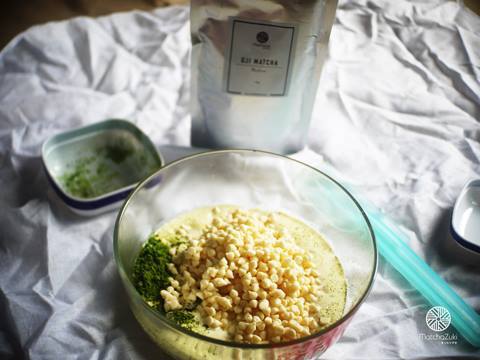
1. Pour whipping cream into a heat-proof bowl and microwave on high for about 30 seconds or until the whipping cream boils slightly. Remove from heat and add white chocolate and green tea powder. Stir until melted.
2. If the mixture is not completely melted, microwave for 15 seconds at a time or until the mixture is fully melted. Let it cool. When cool, refrigerate for at least 3 hours.

13709873_1726085940949737_5412414674268495390_n
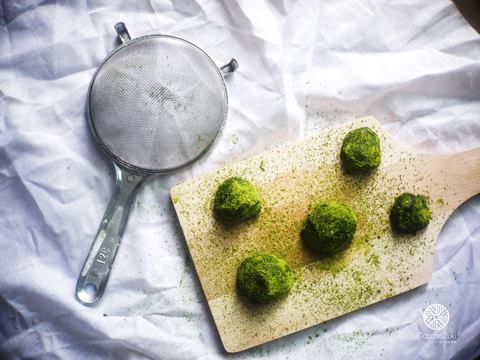
3. When the mixture is cool and firm enough to be molded, take it out and mold it into balls (the truffles will not be very round, don’t worry about it) and mix with the green tea powder again.

13645301_1726085934283071_7475257028576169400_n

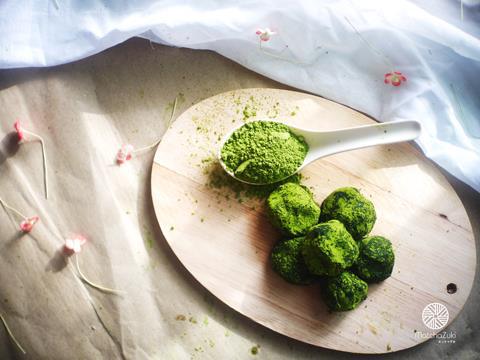
Arrange them on a beautiful plate and eat them with hot tea. They go together very well. However, truffles are a dessert that should be eaten while they are still cold. If you are not going to eat them, do not mix them with green tea powder because the moisture in the dessert may make the green tea powder look unappetizing. I recommend mixing them with green tea powder when you are going to eat them. It will look more appetizing. See you next time ^^

———————————-

MATCHAZUKI – Crafted for matcha lover
“Because we choose matcha, like people who love matcha.”⠀⠀
It’s a beautiful place.

Matcha Cheese Tart Matcha Cheese Tart

Hello everyone, back to our regular Friday meeting. Today, the MATCHAZUKI page, premium grade matcha powder from Japan, would like to recommend another popular dessert recipe that cheese lovers shouldn’t miss. That is Matcha Cheese Tart, which is sweet, creamy, and full of cheese flavor and intense green tea flavor. Eat it while it’s hot, it feels like eating cheese lava, or eat it in the evening, it has a chewy texture like cheesecake. Let’s take a look at the ingredients and how to make it. ^^

13590322_1723109364580728_3627544171691979056_n

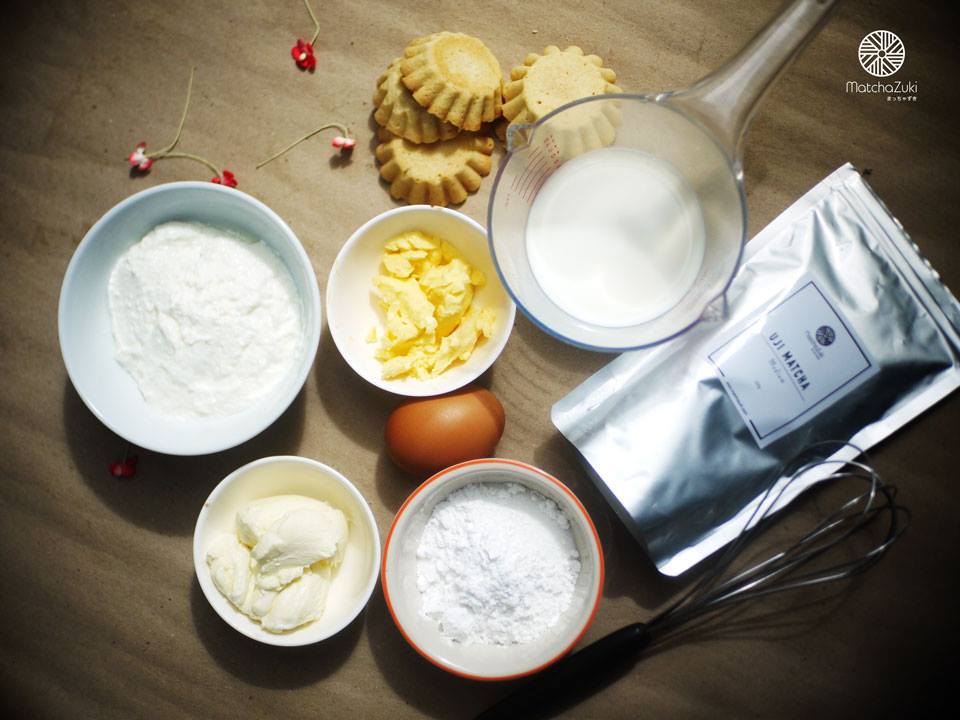
Key Ingredients
Tart section
1. 100 grams of all-purpose flour
2. Butter 60 grams
3. Icing sugar 25 grams
4. Salt 4 grams
5. Half an egg (Beat the egg and use only half)
6. Baking tray as desired and rolling pin

Matcha Cheese Custard Part
1. Cream cheese 150 grams
2. Mascarpone cheese 70 grams
3. 30 grams of butter
4. Fresh milk 90 grams
5. 30 grams of icing sugar (you can add more if you like it sweeter)
6. Cornstarch 10 grams
7. 1 ½ tablespoons of medium grade Matchazuki matcha powder
8. 1 chicken egg
9. ½ tablespoon lemon juice
10. 1 teaspoon of salt

Procedure
Tart section

13557801_1723109354580729_8210836968419928219_n
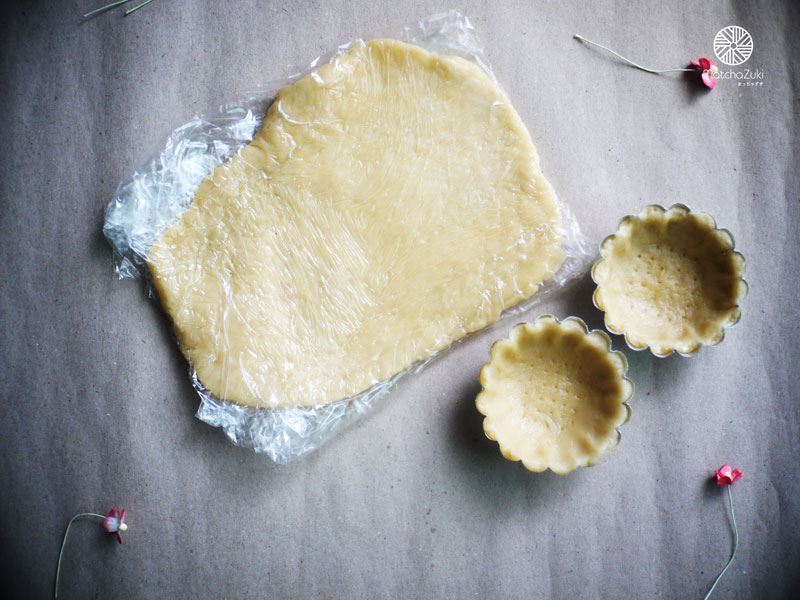
1. Sift flour into a mixing bowl, then add slightly softened butter and mix until well combined. Add icing sugar and salt, then add egg and knead until well combined. Wrap with plastic wrap and refrigerate until butter sets, about 2 hours.

13620953_1723109361247395_5207268051118111725_n

2. Preheat oven to 180 degrees Celsius. Remove dough from refrigerator, roll dough to about 3 mm thick and line mold as desired. Poke small holes in mold with fork. Bake in oven for about 15-20 minutes or until tart is golden brown.

Matcha Cheese Custard Part
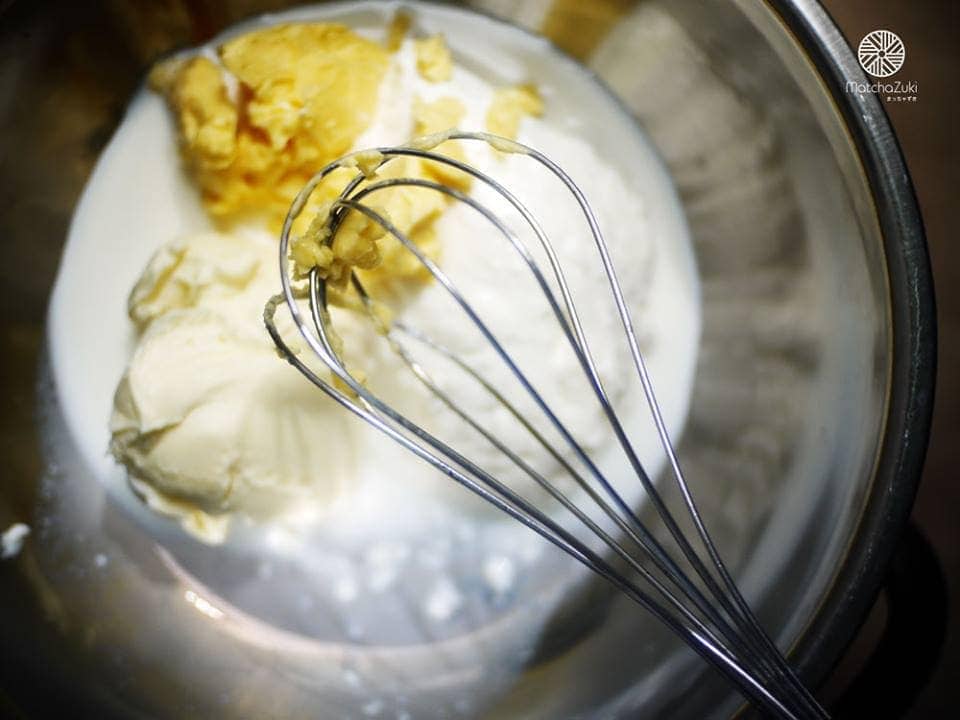
1. Place the cream cheese, mascarpone cheese, butter, and half of the milk in a heatproof container (such as a small saucepan or stainless steel bowl). Stir to combine. Bring a larger saucepan of water to a boil over medium heat. Place the container of cheese over the saucepan (double boiler technique) and stir until the mixture is hot and starts to liquefy.

13631625_1723109371247394_2162419518012707637_n

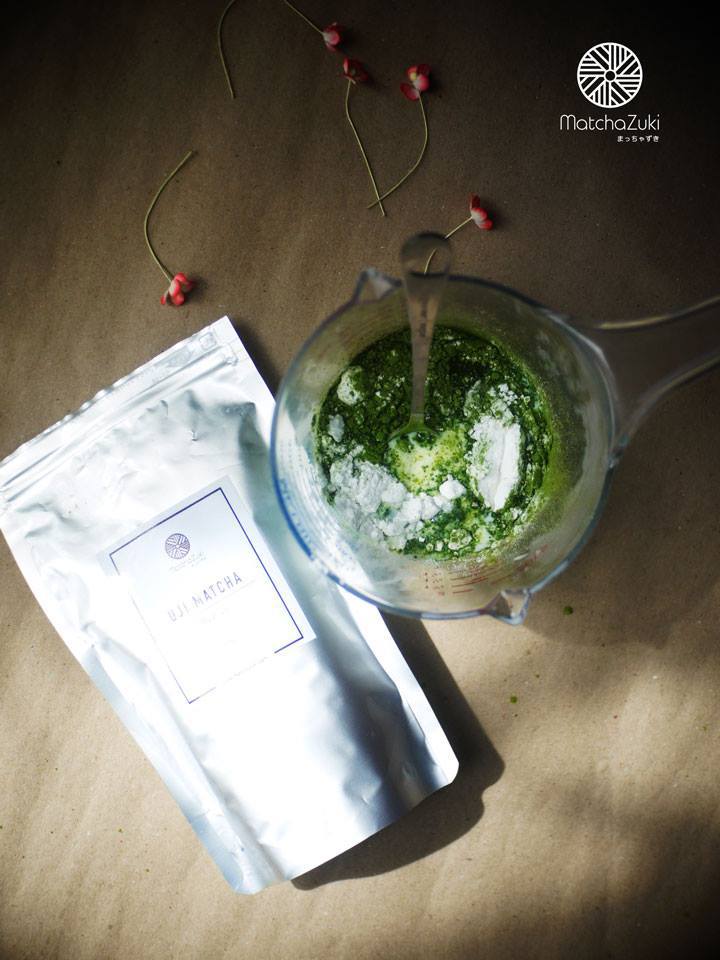
2. Add icing sugar, matcha powder, cornstarch to the remaining milk, mix well and pour into the first mixture. Mix well.

3. Add beaten eggs, salt and lemon juice. Stir constantly to prevent lumps. Stir until mixture thickens and no longer runs from spatula. Cool. Transfer to a piping bag.
4. Squeeze the mixture into the prepared tart shells. Bake at 180 degrees for 10 minutes (if the mold is large, it takes longer) or until the custard surface is firm and dry and does not stick to the fingers.

13599893_1723109357914062_8979183326140689642_n

Matcha Cheese Tart is a dessert that can be eaten both hot and cold. If eaten hot, the custard will be oozing and flowing like lava. But if you put it in the refrigerator, the texture will be as thick as eating cheesecake. It gives a different feeling. Whoever likes which one, choose it as you like. And don’t forget to tell me which one you like more ^^

———————————-

MATCHAZUKI – Crafted for matcha lover
“Because we choose matcha, like people who love matcha.”⠀⠀
It’s a beautiful place.

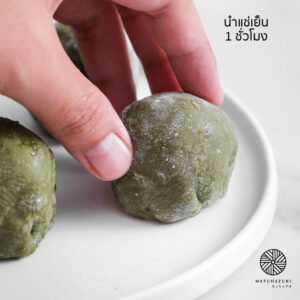
Matcha Strawberry Daifuku, Matcha Daifuku with Red Beans

Matcha Strawberry Daifuku
It’s a beautiful scenery.

Super juicy green tea daifuku with red beans. Once you try it, you’ll fall in love with it^^
Sweet and sour, well-rounded, perfect for this recipe… Just use MATCHAZUKI Medium, real matcha that gives a fragrant, rich aroma, smooth and fine texture. Easy to make for any menu. Let’s go see the recipe.

Key Ingredients
Part 1

  1. 400 grams of red bean paste
  2. Strawberries (small) 15 pieces

Part 2

  1. 25 grams of tapioca flour
  2. 200 grams of glutinous rice flour
  3. 70 grams of sugar
  4. MATCHAZUKI Medium Grade Matcha Powder 6 grams (~3 teaspoons)
  5. Plain water 330 ml
  6. 1 cup tapioca flour for sprinkling when kneading the dough

Procedure

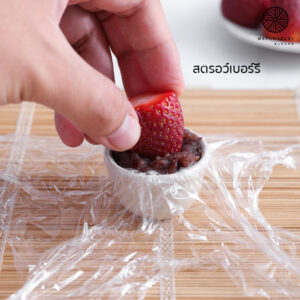
  1. Place a piece of plastic wrap on a cup slightly larger than the strawberries. Press the plastic wrap into the shape of a cup with your hands.
  2. Put red beans and strawberries in a bowl.
    .
    .
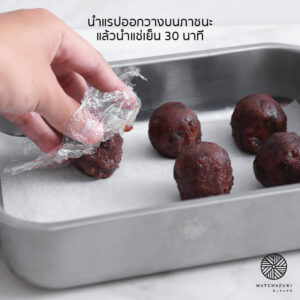
  3. Wrap the plastic wrap together and shape the red bean and strawberry fillings into balls. Once you have the desired shape, remove from the plastic wrap and place in a container. Refrigerate for 30 minutes.
    .
    .
  4. Mix tapioca flour, glutinous rice flour, matcha powder and sugar in a mixing bowl.
  5. Gradually add water and stir until the ingredients are completely dissolved.
    . .
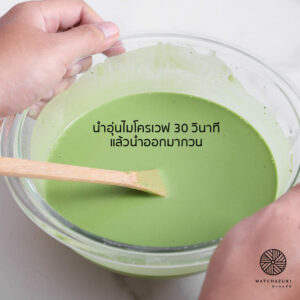
  6. Microwave for 30 seconds and stir.
  7. Then heat it for another 6-8 times, 30 seconds each time, until the dough starts to stick.
  8. Sprinkle flour on the kneading surface and cut the dough into small pieces.
  9. Use your hands to knead the dough into a sheet, then use a rolling pin to make it a thin sheet.
  10. Place the prepared red bean filling on the dough sheet.
  11. Wrap the dough together, press the dough to cover the red bean filling tightly, then cut off the excess dough. Then, tuck the ends neatly.
  12. Refrigerate for 1 hour and the matcha red bean daifuku is ready to serve 😀
    .
    .
    .
    ***See more detailed steps on how to make strawberry matcha daifuku in the video below.
    .

———————————-

MATCHAZUKI – Crafted for matcha lover
“Because we choose matcha, like people who love matcha.”⠀⠀
It’s a beautiful place.

Matcha Chocolate-Dipped Strawberries

Hello, after posting the “Matcha Chocolate-Dipped Strawberries” menu a few days ago, many friends were interested. Today, I would like to share a recipe for a cute menu that anyone can make. This menu is called Matcha Chocolate Dipped Strawberries in Thai. It is an easy dessert that I would like to recommend. Let’s see the ingredients and how to make it. ^^

2

Key Ingredients

  1. 8-10 strawberries (freeze for at least 3 hours)
  2. White chocolate 200 grams
  3. 1 tablespoon MATCHAZUKI medium grade matcha powder (for mixing with white chocolate)
  4. 1 tablespoon MATCHAZUKI medium grade matcha powder (for sprinkling on top of desserts)
  5. 5 grams of butter

Procedure

  1. Place white chocolate in a microwavable bowl and heat for 30 seconds. When you remove it, you will notice that some of the chocolate has melted. Stir to distribute heat evenly, then microwave for another 30 seconds. Remove and stir again.3
  2. Add butter to the melted white chocolate and mix until well blended. Once the butter has melted into the chocolate, add the green tea powder and mix again.4 5
  3. Remove the stem from the frozen strawberries and insert a skewer into the stalk instead, but not too deep. Dip the strawberries in the matcha chocolate. (Note: Freezing the strawberries will make them easier to dip and the matcha chocolate will harden faster.)6
  4. When the chocolate starts to harden, add the prepared green tea powder to a sieve and sift it to coat the strawberries that we have dipped in again to increase the intensity of the green tea flavor and make it look more beautiful and delicious.7
  5. Arrange on a beautiful plate. You can sprinkle matcha powder on the plate to make it look more beautiful and appetizing. If you want to cut the strawberries to show their beauty, we recommend that you dip the knife in hot water and wipe it dry before cutting. The matcha chocolate will not break. Or if you are going to give it as a gift, we recommend that after putting it in a box and tying it with a beautiful bow, put dry ice in a small box again because the chocolate should be in a cool place where it will be harder to melt.8

———————————-

MATCHAZUKI – Crafted for matcha lover
“Because we choose matcha, like people who love matcha.”⠀⠀
It’s a beautiful place.

Green Tea Matcha Chiffon Cake

How to make Green Tea Matcha Chiffon Cake^^

This recipe is from Khun Jumjee in Pantip. The ingredients and method are mostly the same as the original. The only change is the matcha green tea powder and a little bit of matcha green tea powder is added to the cream. ^^

Key Ingredients (for a 2-pound cake)

Cake batter

1. 40 grams of cake flour

2. 50 grams of fine baking sugar

3. Matcha green tea powder (medium grade) 2 teaspoons

5. 1/4 teaspoon salt

4. 1/2 teaspoon vanilla powder

6. Egg yolks (size 2), 2 eggs

7. Vegetable oil (in the recipe, soybean oil is used) 30 grams

8. 50 grams of fresh milk

9. 2 egg whites

10. 30 grams of powdered sugar

11. A little bit of lemon juice

Cream part

1. Whipping cream 250 grams

2. 50 grams of fine baking sugar

3. MATCHAZUKI Excellent grade matcha powder 1.5 teaspoons

Procedure

1. Put flour in a bowl, followed by sugar , matcha green tea powder, vanilla powder, and finally salt.

2. Use a hand whisk to mix all ingredients until they are well blended and do not clump together. Set aside.

3. Next, make the egg yolk part. Start by cracking cold eggs into a cup or bowl (eggs are very important for chiffon cake, so they should be fresh). Separate the egg yolks from the whites, then put the egg whites in a mixing bowl and set aside.

4. Add the egg yolk cup, add oil and then add fresh milk. Set aside.

5. For the last part, which is the egg white part, prepare these 3 things: egg white, lemon juice, and powdered sugar. Separate them first. But you have to prepare them because you have to make them quickly and bake them quickly, or else the eggs will collapse.

6. Preheat oven to 180 degrees Celsius.

7. When everything is ready, start by beating the egg whites on high speed until they are foamy.

8. Squeeze some lemon juice.

9. Then gradually add in the powdered sugar. Do not add it all at once, as this may cause the egg bubbles to collapse.

10. Beat until it forms peaks as shown in the picture.

11. Make the egg yolk mixture. Pour the egg yolk mixture into the flour mixture. Some people may make a well in the center, which will help.

12. Stir quickly, vigorously, and just right. This is the phrase you need to memorize when stirring the egg yolk mixture (the cake will come out soft and melt in your mouth or tough and rough depending on the amount of stirring). Stir until just combined. If you don’t see any white flour, stop immediately.

13. Put the egg whites on top. Actually, according to the theory, you have to pour the flour and egg yolk mixture on top because the egg yolk flour mixture is heavier than the egg white mixture. If we put it on the bottom like this, it will make it difficult to mix together. But that doesn’t mean there’s no way around it. After putting it in like this, flip the egg yolk flour mixture over and pour it on top of the egg white mixture. It will be much easier to mix.

14. Use a rubber spatula to mix the ingredients together. [*Folding means to scrape the rubber spatula along the surface of the mixing bowl to lift the ingredients that are stuck to the edges of the bowl (which are usually heavy ingredients, such as egg yolk flour, etc.) up, not sticking to the edges of the bowl, which will make it difficult to mix. When the heavy ingredients have lifted up to prevent them from sticking back to the edges of the bowl, we flip the rubber spatula to place the heavy ingredients in the center. Now it’s easy to mix, which is called folding.]

15. When mixed together, stop mixing. Observe that the color of the mixture has no streaks. A dark color (in this case, green) means it is mixed. Tap the mold first by doing the following: hold the mold higher than the table surface and let the mold fall freely. Do it about two times to get rid of air bubbles in the cake. Don’t be afraid of it collapsing. Then pour it into the mold and put it in the oven.

16. Bake for about 30 minutes. (**Note: The cake must be cooked. Check for doneness by touching the surface of the cake with your finger. If it sinks and you see a mark when you remove your finger, it is not done yet. Bake for another 3-5 minutes and touch it again. If you start to see no sign of sinking, it is done. Remove it from the oven and use the same technique as before baking: let it fall freely. If it is done, it will not sink, I guarantee it.)

17. Let it cool in the mold or you can scoop it out. It’s not against the rules. Another technique is to turn it upside down on a wire rack. I’ve shared this with my friends, brothers, and sisters here. It’s a good technique because it prevents the cake from collapsing and the texture of the cake is light.

18. Then slice the cake.

19. Now let’s make the cream. This recipe is smooth and not too sweet. If you add more sugar, the aroma of the whipped cream will be greatly reduced. Believe it or not, put the whipping cream in the freezer. But don’t put it in for too long because there is a high risk that the whipped cream will separate. Actually, it is not recommended for beginners because it is easy to make a mistake. But if you have done it before, you can freeze it for 10-15 minutes and it is still usable and easy to whip.

20. When done, beat at high speed and gradually add in powdered sugar. Actually, beat until it starts to form a whisk mark on the whipped cream, then add it right away or add a little bit first. But don’t add it too late because the sugar will not dissolve.

21. When the peaks are stiff, it’s ready. Don’t make it too runny because it will run. It’s okay if it’s a little stiff because the cake is already light. But don’t beat it too much until the whipped cream separates. When you can see the whisk’s tip clearly, you can stop. Be careful with this.

22. Once it’s done, you can put the cream in the refrigerator first because it might be hot. You can freeze it for about 10 minutes, then start decorating it. Spread the cream until it’s as thick as in the picture. Stick the top piece.

23. Spread the cream all over the cake.

24. The final step is to sprinkle green tea powder onto the surface by sifting it through a sieve.

That’s it. Have fun doing it ^.^

matcha-cake2

Credit : http://topicstock.pantip.com/food/topicstock/2008/01/D6272478/D6272478.html

———————————-

MATCHAZUKI – Crafted for matcha lover
“Because we choose matcha, like people who love matcha.”⠀⠀
It’s a beautiful place.

Matcha Mousse Pie Green Tea Mousse Pie

Hello everyone, welcome back as usual. Today, the MATCHAZUKI page, premium grade matcha powder from Japan, would like to recommend another easy dessert recipe that does not require an oven, which is Matcha Mousse Pie or green tea mousse pie. It is a soft and smooth dessert with a rich green tea flavor. You can make it yourself or surprise your loved one. With its soft texture that melts in your mouth, it is another dessert that has captured the hearts of many people. Let’s see the ingredients and how to make it. ^^

5

Key Ingredients (This recipe makes about 3 cups)
1. 70 grams of finely crushed chocolate wafers (e.g. Oreo , with the cream removed)
2. 40 grams of melted butter
3. 1/3 cup of granulated sugar (add more if you like it sweeter)
4. 3 tablespoons of medium grade Matchazuki matcha powder
5. 2 sheets of gelatin sheets
6. 4 egg yolks
7. 2/3 cup fresh milk
8. 1 cup whipping cream

Procedure
1. Mix the crushed chocolate wafers with melted butter until it resembles wet sand. Scoop into glasses or desired containers. Press into a pie base and refrigerate to set.
2. Use a whisk to beat the egg yolks until fluffy and the color becomes lighter. Then set aside.
3. Soak gelatin in cold water and set aside. Then add sugar, green tea powder, and fresh milk in a pot and mix well. Then put on low heat and stir continuously until the mixture is well dissolved.
4. When the green tea mixture starts to boil slightly, add the soaked gelatin until soft, squeeze out the water, put it in a pot, stir until dissolved. Then slowly pour the beaten eggs into the pot, stirring constantly to pasteurize the eggs and prevent them from curdling. The green tea will thicken. Wait for it to boil slightly again, turn off the heat, and set aside to cool.

4
5. Whip the whipping cream until soft peaks form, then mix with the cooled green tea mixture and stir until well blended.

3
6. Pour the well-mixed mixture into the prepared pie crust container, smooth it out, and refrigerate for at least 3 hours to set the mousse.

1
7. When the mousse is set, sprinkle green tea powder on top of the dessert to add richness and decorate with fruits as desired.

Matcha Mousse Pie is a dessert that requires cooling to set. If you are not going to eat it right away, do not remove it from the refrigerator.

———————————-

MATCHAZUKI – Crafted for matcha lover
“Because we choose matcha, like people who love matcha.”⠀⠀
It’s a beautiful place.

Matcha Pancake Green Tea Pancake

Hello, the holidays are coming soon. Today, the MATCHAZUKI page, premium Japanese matcha powder, has a breakfast menu that is perfect for eating with a hot drink that is easy to make and delicious. That is Matcha Pancake or green tea pancake. Let’s see how easy it is to make ^^

Key Ingredients
Pancakes
1. 100 ml. fresh milk
2. 100 grams of cake flour
3. 1 tablespoon cornstarch
4. 3 tablespoons of sugar
5. 1 teaspoon of medium grade MATCHAZUKI matcha powder
6. ½ tablespoon baking powder
7. 1 chicken egg
8. 1 tablespoon vegetable oil or melted butter

Green tea sauce
1. 20 ml. fresh milk
2. 20 ml. hot water
3. 1 teaspoon of medium grade MATCHAZUKI matcha powder
4. 1 tablespoon sugar
5. 2 teaspoons cornstarch

Procedure

1. Put cake flour, corn flour, baking powder, sugar, and green tea powder in a mixing bowl. Mix them together and set aside.

2. Beat the eggs with milk and vegetable oil until well blended. Pour into mixture 1. Mix until well blended. Let the mixture rest for 15 minutes.

3. Meanwhile, combine all the green tea sauce ingredients and stir until melted. Microwave for 30 seconds. Remove and stir until well combined. Set aside to pour over pancakes.

4. Fry the pancake mixture in a Teflon pan. Arrange on a plate and serve beautifully. Pour green tea sauce over it.

Green tea pancakes are easy to make and don’t require many tools. They’re also delicious when eaten with ice cream or fruit. They’re even fluffier when eaten hot, and go well with hot drinks. ^^

———————————-

MATCHAZUKI – Crafted for matcha lover
“Because we choose matcha, like people who love matcha.”⠀⠀
It’s a beautiful place.